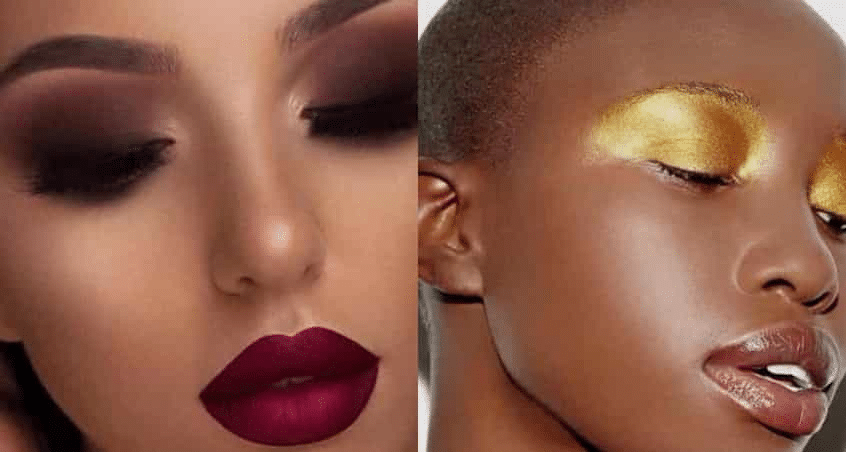
Diversity in the world of makeup has opened up new gates for dark skin tones. Read this for the basics of how to apply makeup for dark skin tones.
The versatility in makeup products has also created confusion. It can be confusing to pick out or purchase makeup products for your skin, especially when you are new to makeup. Even with diversity and inclusion being introduced in the world of makeup, it can be difficult to find makeup guides for dark skin. This article addresses the needs and provides tips to help you learn how to apply makeup on your dark skin.
Makeup essentials
Whether you are a beginner or have been doing makeup for some time, it is essential to have specific makeup products in your collection. Read on for an essential list of products you need to have for the perfect make up every time.
A good foundation – The foundation forms the base of the makeup and plays a huge role in the entire makeup look. When looking for a foundation, you need to find one that matches your skin perfectly for a natural blend.
How to find the perfect foundation for dark skin
Regardless of your skin color, finding the right foundation is essential. Thanks to broader foundations being introduced by diversified companies in the makeup industry, it is now easier to find something from every shade. Below are some tips for when you are choosing a foundation
Know your undertone
Before you purchase any makeup, you should find out your undertone. The undertone is an underlying shade in your complexion and can be neutral, warm, or cold. The primary way of identifying your undertone is to check it out in natural light.
Make sure you focus on the hue of your skin and ignore discoloration, acne, and redness when checking for your undertone.
Warm undertones – People with warm undertones tend to have yellow, golden, honey, and peachy undertones. If you have warm undertones, your veins will appear greenish in natural light and gold looks better on you than silver.
Cool undertones – People with cool undertones have blue, red, and pink hints on their skin. Your veins will likely look purple or bluish in natural light and silver jewelry looks best on your skin.
Neutral undertones – neutral skin has no apparent blue, pink or warm undertones. Veins appear blue-green and you can rock both gold and silver jewelry.
Use the shade finder
Makeup companies now have shade finders on their websites to help people of all shades and undertones find their ideal foundation color range.
Test out the products
The ultimate test to finding the right foundation for your skin is through testing. If you are planning to purchase your foundation online, then it will be a little difficult for you. Testing the foundation on the jawline will help you spot the right foundations. The jawline has bright natural skin tones which allow you to tell if a foundation match is right.
If a foundation appears too muddy, it is too dark for your skin. If it appears chalky, that means it is too light. You will be able to tell if a foundation does not match your skin tone because the colors will be off.
Eye makeup – all eye makeup tools you need include eyeliner, mascara, eye shadow pallet meant for dark skin, and a brow pencil.
Lips – for the lips, you will need lip liners, lip moisturizer, lip gloss, nude lipsticks, and bold lipstick.
Other products you might need
Blush and highlighter – the rules of makeup are changing and we are now starting to realize how much more we can do with color. Blush does not have to be pink and red; you can get one to complement your undertone as well as your whole make up look.
A concealer – while concealers are not essential for everyone, they are pretty great at hiding blemishes. You can use concealer to hide hyperpigmentation, discoloration, and dark spots on your skin. Make sure the concealer matches your undertone to blend it in with the rest of the makeup. You can also use a hydrating concealer to cover dark eye circles and bags under our eyes.
Powder
Translucent powder – translucent powder has many uses but it is perfect for setting your make up. Setting powder is used under the foundation to remove any shine and set the foundation so your make up last longer. While translucent powder will not provide any coverage on the face, it can smooth out uneven texture and remove bumpiness or pores.
Tinted powder – tinted powder, on the other hand, can help you mask discoloration and hyperpigmentation as well as textural issues and scars. Tinted powder can also be used in place of foundation and is great for controlling oily skin.
Generally, powder creates a great base for blush, contour, bronzer, and shimmer. While you have the option to apply it on your foundation, it will not last as long as when powder is used. You can also use powder to set cream eye shadow, reduce a bright blush, and more.
How to apply makeup for dark skin tones
Steps 1 – clean out your face
When applying makeup, you always want to start out with a clean face. A fresh face allows the foundation to appear smooth and flawless. It provides you with an even base as well as a clean canvas to start with. If you have a regular skincare routine, all you will need is a quick clean. Make sure you tone your face to balance its pH and prevent any potential oxidization.
Why you should incorporate skincare into your routine
Skincare is an essential step in self-care, regardless of whether you do makeup or not. Taking care of it regularly will guarantee you a happy and healthy skin. All skin is different, which is why you should get advice from a professional on how to care for your skin and its specific needs. If you want good looking skin and prevent potential skin issues, you have to dedicate time to take care of it.
Step 2 – moisturize
Next, massage your favorite moisturizer onto your skin. This prevents the foundation and other products from drying out and flaking, which can be harmful to your skin.
Step 3 – apply primer
Priming is a necessary step for any skin type because it gives your make up a hold and helps it last much longer. Use the primer a few minutes after your moisturizer and let it sit for a couple of minutes before you start the next step.
Step 4 – foundation
The steps for applying foundation on your face vary depending on what kind of foundation you have and the end results you are looking for. If you have oily skin, powder and liquid matter foundation will suit you better but people with dry skin need a moisturizing liquid foundation or a cream.
If you are working with a liquid foundation, pump a couple of drops into a wet beauty blender, then dab it all over your face for an even distribution. Once you are satisfied with the coverage, you can blend it out across your face with the same beauty blender. Alternatively, you could pump some drops in a foundation brush, apply on your face, and blend it out with the same tool.
For a powder foundation, use a powder brush to spread the powder at the center of the face and blend it out to the rest of the face. To get the best results from a cream foundation, you need to warm it up first. You can do this by rubbing the surface of the foundation with your palm and using a wet beauty blender or a brush to spread the creamy foundation all over your face.
Step 5 – concealer
You can use this product to cover up dark spots, blemishes, hyperpigmentation, and pimples under your foundation but it also works wonders when it comes to highlighting your features. Check out tutorials on how to apply concealer under your eyes, above the cheekbone, on your forehead, and at the sides of your nose to bring out your features and shape more. Blend the concealer in with a small beauty blender or a brush and make sure there are no fine lines between the foundation and the concealer.
Step 6 – contouring
For first timers contouring can sound very intimidating. However, it is easy to apply and can make your jawline and cheeks pop. Contouring will add more dimension to your face by softening some areas and chiseling others. Pick a shade darker than your foundation base to contour your face. The contouring line should be applied under the jawline at the sides of your temples and the cheek hollows. When you are done, apply a thin layer of highlighter on your cheekbones for a glam effect.
Step 6 – eyes
You can do your eyes before the foundation or after the concealer depending on what you feel is most comfortable for you. If you are a beginner, I would recommend starting with the eyes so you can use other products like foundation and concealer to correct any mistakes you might have made. Different looks will determine what type of eye you are going for. For a glam makeup, you should go for bright colors and bold eyelashes. If you are going for a more natural look, wear nudes, browns, and autumn colors. For an everyday natural look, you only need to do eyeliner and nude eye shadow.
Setting spray
Your makeup look is not complete without a setting spray. Setting sprays hold the makeup together so it can last you for longer.

